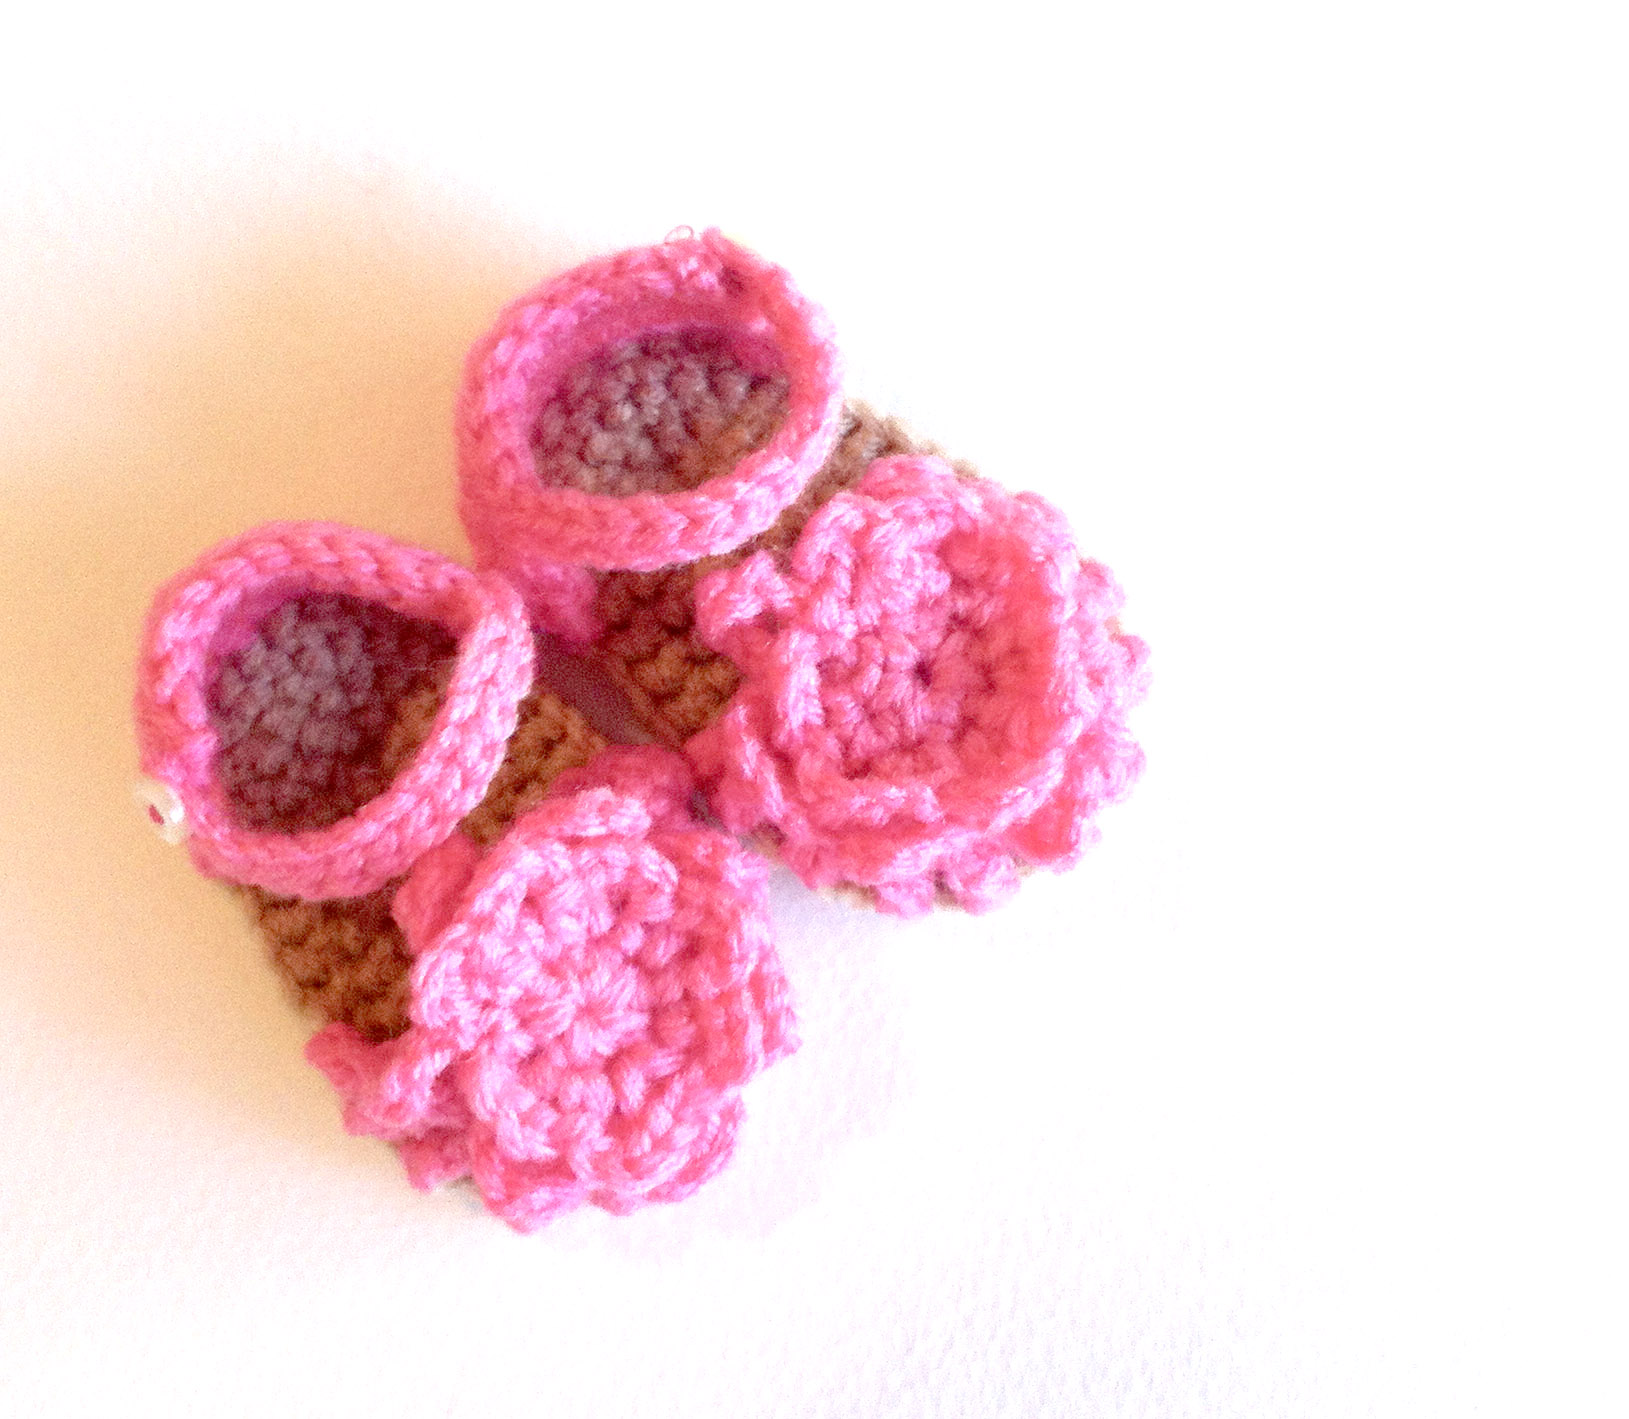
I decided to feature another one of my personal patterns today since it is one of my current projects. I am making some more of the Suzy Sandal for a client as well as for a friend. My little Tessa has now worn her Suzy sandals many times, so I can tell you about the fit and versatility. I made an adjustment that isn’t on the first pattern, but has since been updated. So, if you have the previous version, make sure you check out the update.
SUZY SANDAL UPDATED PDF——> Suzy Sandal
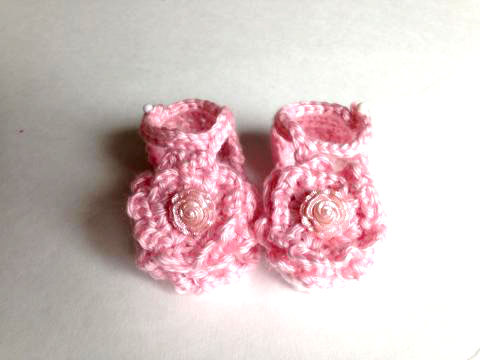
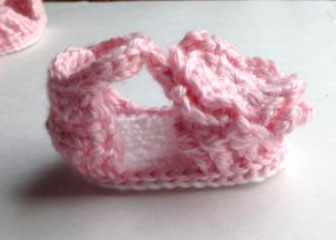 Babies’ shoes don’t really stay on very well. If they fit around the ankle, they don’t fit in the length. Most of the time, they slide right off of the foot because babies don’t really have a heel to speak of. These shoes, though, fit very well. I should mention that the updates add a strap connecting the ankle to the toe cap, keeping them on the foot. Without the update, they tend to flop off of the foot.
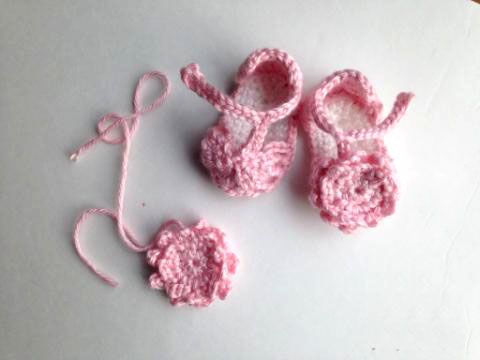
These shoes are great for spring, summer, or fall weather. Add some socks and they could be worn in the winter, too. They are very versatile and pretty quick to work up.

I decided to give a little bling to the toe cap by simply adding a pretty button.
You can click on the pdf file above the images, or view the pattern following:
(Please remember, you may use this pattern as you wish- and sell finished products- but please do not sell or alter the pattern. Please link back to chelsiebrady.wordpress.com)
Suzy Sandal
By Chelsie Brady
Size F hook (3.75 mm)
worsted weight yarn
Sole:
Chain 9
Row 1: 3 sc in second stitch from hook, sc in next 2 stitches, hdc, dc in next 3 stitches, 6 dc in last stitch. Working across other side of chain, dc in next 3 stitches, hdc, sc in next 2 stitches.
Row 2: Starting in the first sc of the last round, 2 sc in each of the next 3 stitches, sc in next 6 stitches, 2 sc in each of the next 6 stitches, sc in next 6 stitches.
Row 3: Starting in the first sc of the last round, *sc in next, 2 sc in next,* Repeat 3 times, sc in next 8 stitches, *sc in next, 2 sc in next,* Repeat 4 times, sc in next 8 stitches.
Row 4: sc in next 2 stitches, 2 sc in next, sc in next 2 stitches, 2 sc in next, slip stitch in next stitch
Row 5: slip stitch in each stitch around. Fasten off. (39 stitches) Turn the entire sole over so that the back of the sole is on the inside of the shoe. When you reattach the yarn, attach it only on the inside loops.
Heel:
Attach yarn using a slip stitch 3 stitches from where you left off on the sole IN FRONT LOOPS ONLY.
Row 1: Chain 2 (This will be counted as your first dc), dc in each of the next 11 stitches (you should have 12 dc, including the first ch 2), chain 1, TURN
Row 2: hdc in next 2 stitches, hdc2tog in next, hdc in next 2 stitches, hdc2tog in next, hdc in last 2 stitches. Chain 1, TURN
Row 3: hdc across all 8 stitches
For left shoe: chain 16, slip stitch in 2nd stitch from hook and next 8 stitches. Chain 6. Slip Stitch in 3rd stitch from hook and in each of the next 2 stitches to get back to the ankle strap. Continue slip stitching each stitch across the strap and back of the shoe. Fasten off.
For right shoe: slip stitch across the back of the shoe (8 slip stitches), chain 16, slip stitch in 2nd stitch from hook and next 8 stitches. Chain 6. Slip Stitch in 3rd stitch from hook and in each of the next 2 stitches to get back to the ankle strap. Slip stitch in remaining stitches on strap. Slip stitch strap to back of shoe. Fasten off.
Toe:
Attach yarn using a slip stitch in the 4th stitch from the left heel stitch on the sole IN FRONT LOOPS ONLY.
Row 1: Chain 4 (This will count as your first tc),* skip 1 stitch, tc in next stitch, chain 1,* Repeat 9 times, skip next stitch, tc in next stitch (this should be the 4th stitch from the heel.) chain 2, TURN
Row 2: Making your stitch around the ch 1 that is between the tc of the last row, dc2tog 5 times. chain 2, slip stitch to the first dc2tog stitch to close off the toe cap. Fasten off.
Flower:
Make a magic ring with 7 hdc, slip stitch to first hdc and pull tail to close off ring.
Row 1: *Chain 4, sc in next stitch* Repeat 7 times to make 7 petals.
Row 2: *Chain 6, sc in back loops of the sc from last row (should create a petal right behind the petal from row 1)* Repeat 6 times, chain 6, slip stitch in last stitch to make 7 petals
Fasten off, leaving a long tail to sew flower on to the toe cap.
Weave in all ends, sew flower on. Use a bit of the tail from the flower to sew your strap in the center of the toe cap, under the flower, so that the ankle strap and toe cap are connected.
For the closure around the ankle, I used a small hook and eye closure and a button sewn on to the outside of the strap, just for aesthetics. You can use a sew-on snap or other closure of your choice.
Repeat all steps for the other shoe. Congratulations! You now have a most adorable pair of summer sandals!

Leave a comment